How to DIY Maintain Your Motorcycle Clutch Cable
A well-maintained clutch cable is crucial for smooth gear shifts, consistent power delivery, and overall riding comfort. Over time, dust, moisture, and wear can cause the cable to stiffen or fray, leading to jerky clutch engagement or even sudden failure. The good news? You can easily maintain your clutch cable at home with just a few basic tools and a little patience.
What Does a Clutch Cable Do?
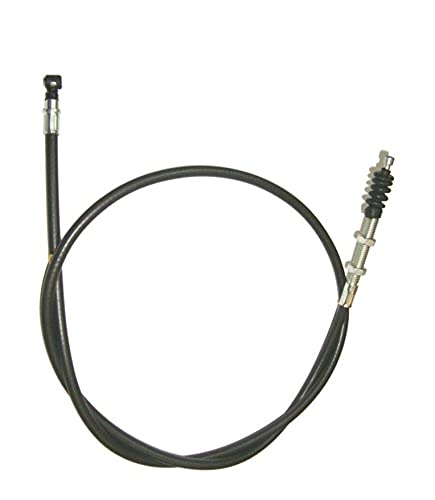
Your motorcycle’s clutch cable connects the clutch lever on the handlebar to the clutch mechanism inside the engine. When you pull the lever, it disengages the clutch plates, allowing you to shift gears smoothly.
A well-lubricated and properly adjusted clutch cable ensures smooth clutch engagement, precise gear shifts, and better control of your motorcycle — especially in city traffic or long rides. A poorly maintained one, on the other hand, can make your clutch feel heavy, sticky, or unresponsive.
Tools You’ll Need for a DIY Motorcycle Clutch Cable
| Tool | Purpose | Links |
| Cable lubricant | Keeps the clutch cable smooth and prevents rust | Buy from Amazon🛒 |
| Adjustable wrench | Used for adjusting clutch tension and lock nuts | Buy from Amazon🛒 |
| Screwdrivers | Helps remove lever or housing covers | Buy from Amazon🛒 |
DIY Steps to Maintain Your Clutch Cable at Home
Step 1: Locate and Access the Clutch Cable
Start by tracing the clutch cable from the lever on your handlebar down to the engine. Remove any covers or panels that might obstruct access. Make sure the bike is turned off and parked on a stable stand.
Step 2: Inspect for Wear, Fraying, or Rust
Carefully examine the outer sheath for cracks, cuts, or fraying. Pull the clutch lever several times — if it feels stiff or doesn’t spring back easily, it’s a sign that the cable needs cleaning or lubrication. Any visible rust or broken strands indicate that replacement may be necessary.
Step 3: Clean the Cable Exterior
Wipe the exposed sections of the cable using a dry cleaning cloth. Removing dust, grime, and oil buildup prevents these particles from entering the inner cable and causing abrasion.
Step 4: Lubricate the Clutch Cable
Use a motorcycle cable lubricant — avoid general-purpose oils, as they can attract dust or damage the cable lining.
If you have a cable lubing tool, attach it to the upper end of the cable and inject lubricant while holding it vertically so gravity helps it flow down. Let the lubricant work through the entire cable housing for smooth operation.
Step 5: Adjust Cable Free Play and Tension
Free play is the small amount of movement the clutch lever makes before it begins to disengage the clutch. Use the barrel adjuster near the lever or the lock nut near the clutch housing to fine-tune this.
Refer to your owner’s manual — most bikes need around 10–20 mm of free play. Too tight can cause clutch slip; too loose can delay gear engagement.
Step 6: Replace Damaged or Stretched Cables
If you notice fraying, rust, or excessive slack even after adjustment, it’s time for a replacement. Always choose OEM (Original Equipment Manufacturer) or high-quality aftermarket cables to ensure durability and proper fitment.
What Are the Symptoms of a Failing Clutch Cable?
- Hard or sticky clutch lever movement
- Inconsistent or delayed gear engagement
- Visible fraying or rust along the cable
- Sudden clutch failure or loss of tension while riding
Ignoring these signs can lead to dangerous riding conditions or sudden mechanical failure on the road.
Why Regular Clutch Cable Maintenance Matters
Regular clutch cable maintenance is a small effort that delivers big benefits:
Ensures smooth and precise gear shifts
Prevents sudden breakdowns due to cable snapping
Extends the life of both the cable and clutch assembly
Improves rider safety, comfort, and control
Your clutch cable may seem like a small component, but it plays a big role in your motorcycle’s performance and safety. Cleaning and lubricating it every 1000–1500 km, or more often if you ride in rain or dust, keeps it working effortlessly. With just a few tools and 20 minutes of care, you can enjoy a smoother ride and avoid costly repairs later on.
Learn Everything about DIY Motorcycle Maintenance
FAQs Around Motorcycle Clutch Maintenance
It’s best to lubricate the clutch cable every 1,000–1,500 km, or more frequently if you ride in dusty, wet, or humid conditions. Regular lubrication keeps the cable smooth, prevents corrosion, and ensures consistent clutch feel.
While WD-40 can be used as a cleaner to remove grime and moisture, it’s not recommended as a long-term lubricant. It evaporates quickly and doesn’t provide the lasting protection needed for cable movement. Always follow up with a dedicated cable lubricant or silicone-based spray.
Use the barrel adjuster near the lever or the lock nut near the clutch housing. Most bikes require 10–20 mm of free play at the lever tip. Too tight can cause clutch slippage, while too loose can delay gear engagement. Always check your owner’s manual for the exact spec.